Building a to-do web app with Hasura GraphQL engine and React.js
If you’ve been following the tech world lately, you’ll know that GraphQL is a cool new query language for APIs. It’s got a lot of features that should make it an easy choice for anyone working on an API: the importance given to what rather than how, the ability to batch multiple requests easily, and the freedom of the client to define whatever data it wants without having to create a new endpoint.
However, GraphQL is not without its problems. Some of them are:
- Difficulty in setting up a GraphQL server
- Defining resolvers for each query/mutation/subscription
- Connecting resolvers to the underlying database
Speaking from personal experience, that last one is definitely a nightmare.
That’s where Hasura’s GraphQL Engine comes in. It provides an easy kickstart to GraphQL development by giving the developer access to Heroku deployment (or Docker container) for a GraphQL server that can perform queries on a connected PostgreSQL database. All we have to do is define our good old table schema and the GraphQL SDL is generated for us (as are the templates for common queries, mutations, and subscriptions). If you know Prisma, Hasura’s engine might sound familiar, but they’re actually quite different. For example, Prisma is an additional database server that interfaces the GraphQL API with the underlying database. You still need to write resolvers that handle queries made to a GraphQL server you write, and you have to define your schema in GraphQL. Hasura allows your front-end to call the GraphQL API directly, just by using a relational Postgres schema.
With that context, let’s get started with building the app.
To follow along in this tutorial, you’ll need a computer with git, React.js and the Chrome web browser. The latter is useful for debugging React applications.
Initialising the project
I’ll be using the create-react-app package to initialise a starter React.js project.
$ npm install -g create-react-app
$ create-react-app graphql-todo
Next, I’ll log on to Hasura’s website and create a new deployment on Heroku. You can either click here or go to this page and click on the deploy button if the former doesn’t work.
This’ll lead you to a setup of a basic project (once you’ve logged in to Heroku, of course). This is what it looks like for me:
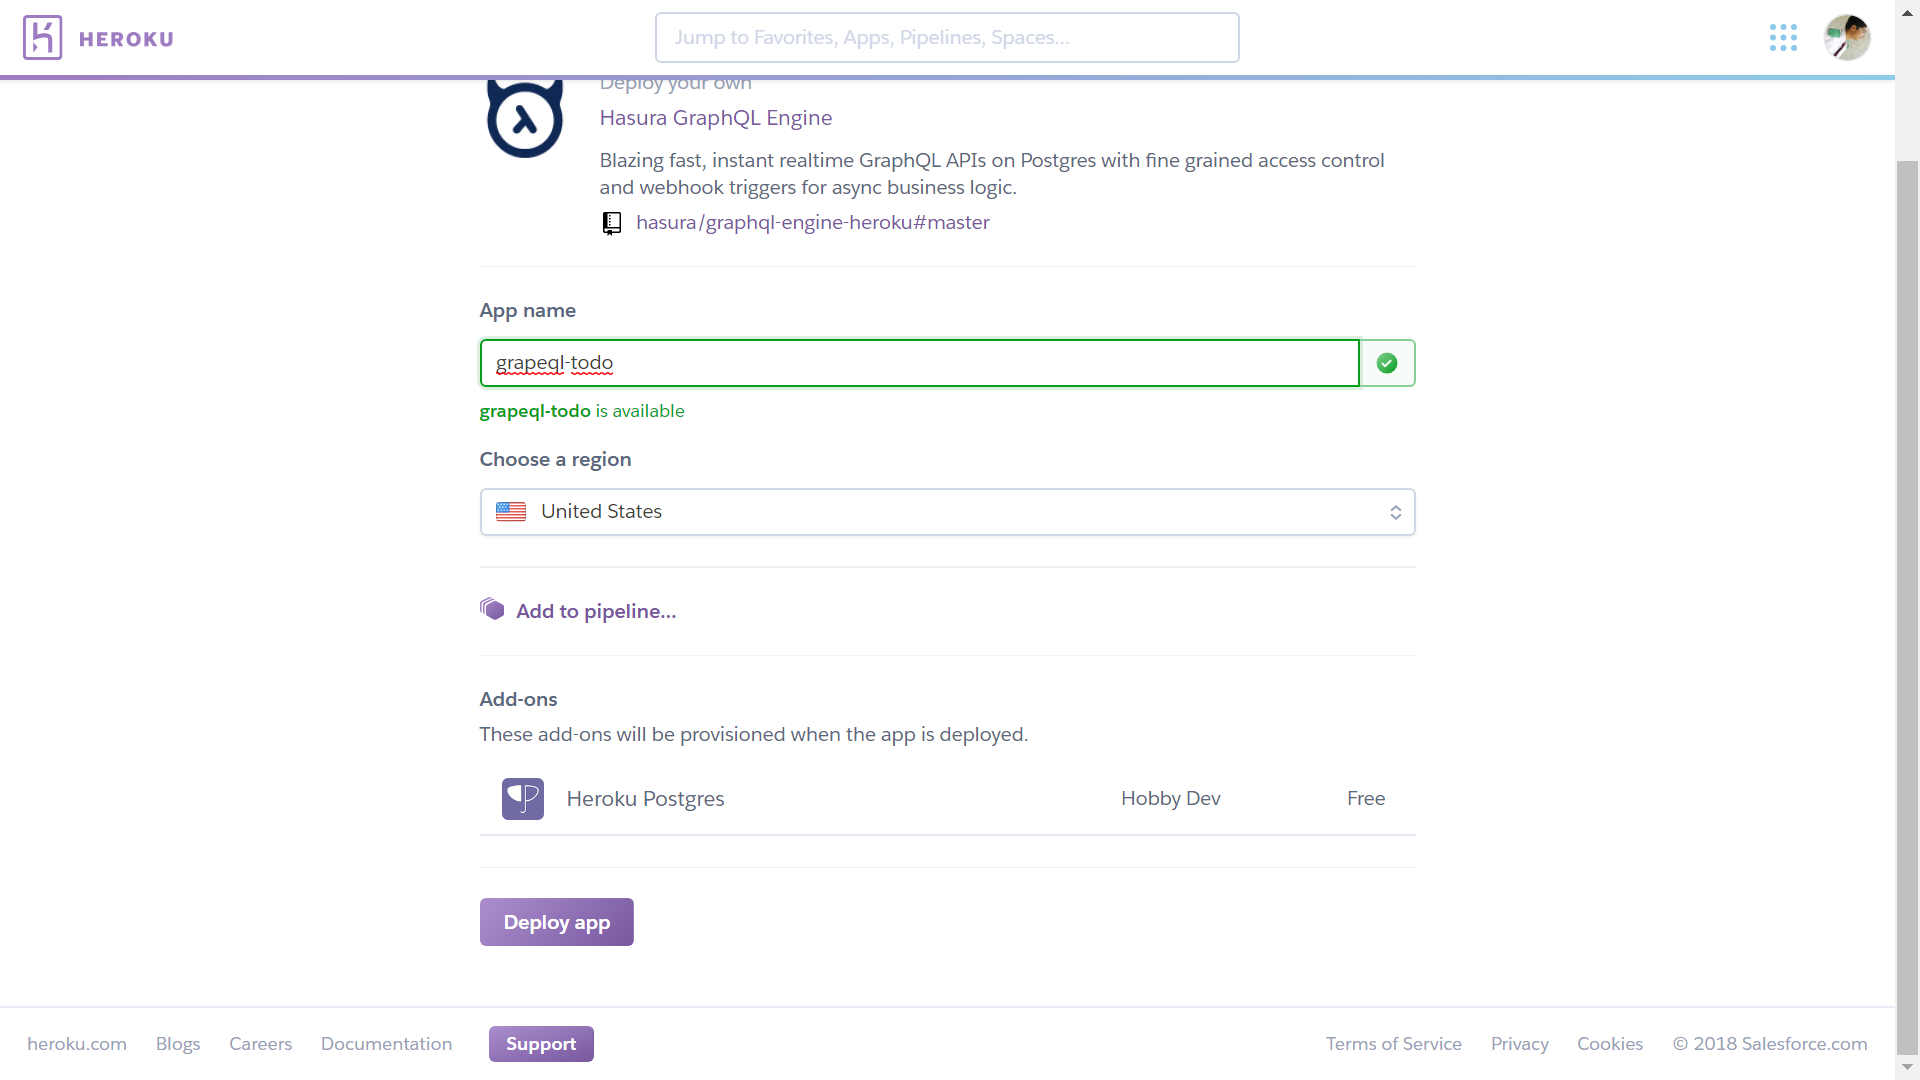
Click on ‘Deploy app’ and we can move on to the next step.
Defining our schema
If you’ve followed the above steps correctly, you should see a dashboard similar to this image below (ignore the headers in the screenshot for now, we’ll come to that later)
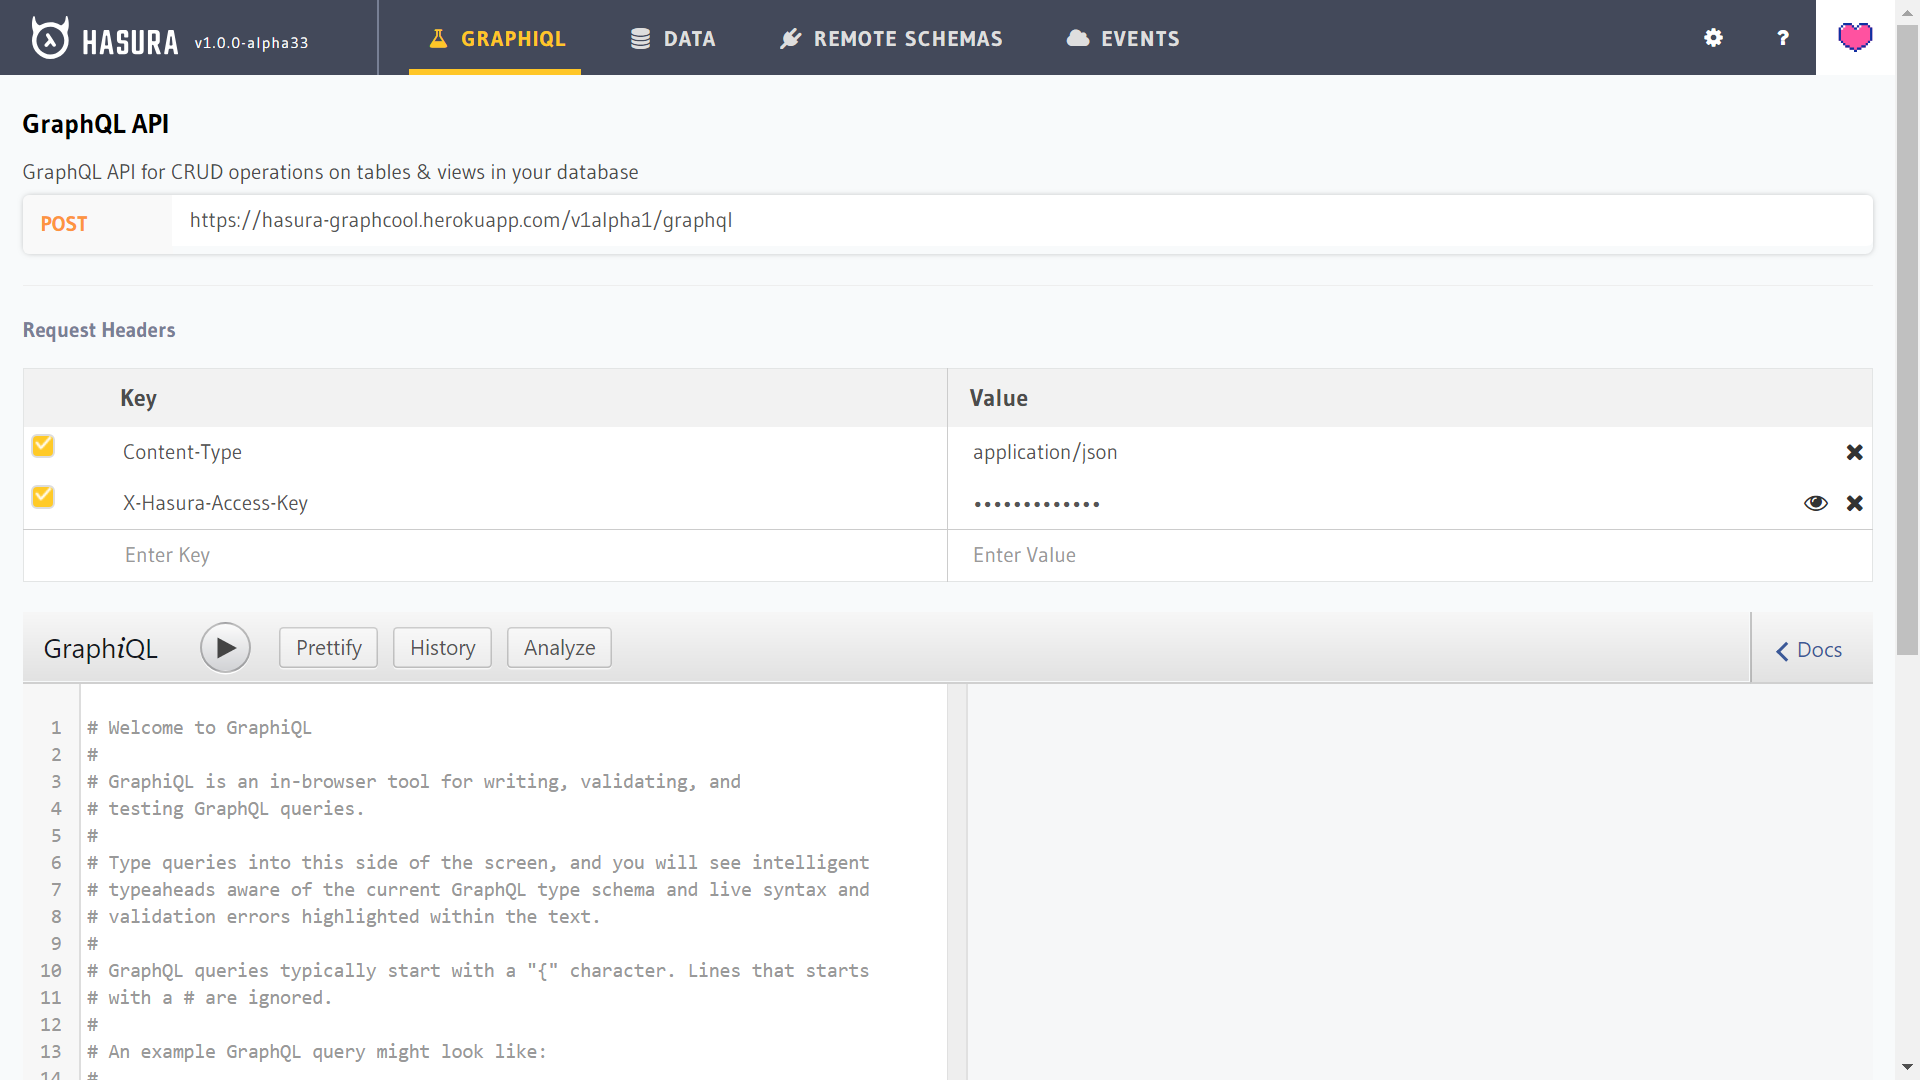
Let’s click on Data in the top row and define our schema.
Our todo app will require users to log in via a Google account. Therefore, we should keep track of the users logging in and link each user account to their todos.
Therefore, we’ll make two tables - todos and users.
Let’s first considers users.
We definitely need to store userId (this’ll be the Firebase-generated UID of each user). This’ll be our relation’s primary key. We also need to store their email, their name, and their profile picture. Not that we’re using any of those for this basic version of our todo app, but we might want to add this information to personalise the app a little in the future.
Next, let’s move to todos. We’ll be storing all todos generated by all users of our app in this table.
We’ll identify todos based on their todoId (a v4 UUID, our primary key) and we’ll also need to associate each todo with a user. For that, we need to store our userId here as well.
We’ll obviously need text (non-nullable, non-unique) of the todo item.
We should probably save the date of creation of the todo as well, to help us sort them.
We’ll store a boolean data item - completed - with each todo that’s pretty much self-explanatory.
One additional constraint we should definitely add here is defining the userId as a foreign key that references the users table. So we can edit the userId field once we’re done defining the schema, and add a relationship.
Relationships are an interesting Hasura implementation of SQL constraints in GraphQL; they do a great job of ensuring data consistency just like constraints defined in SQL.
Our relationship should look something like this:
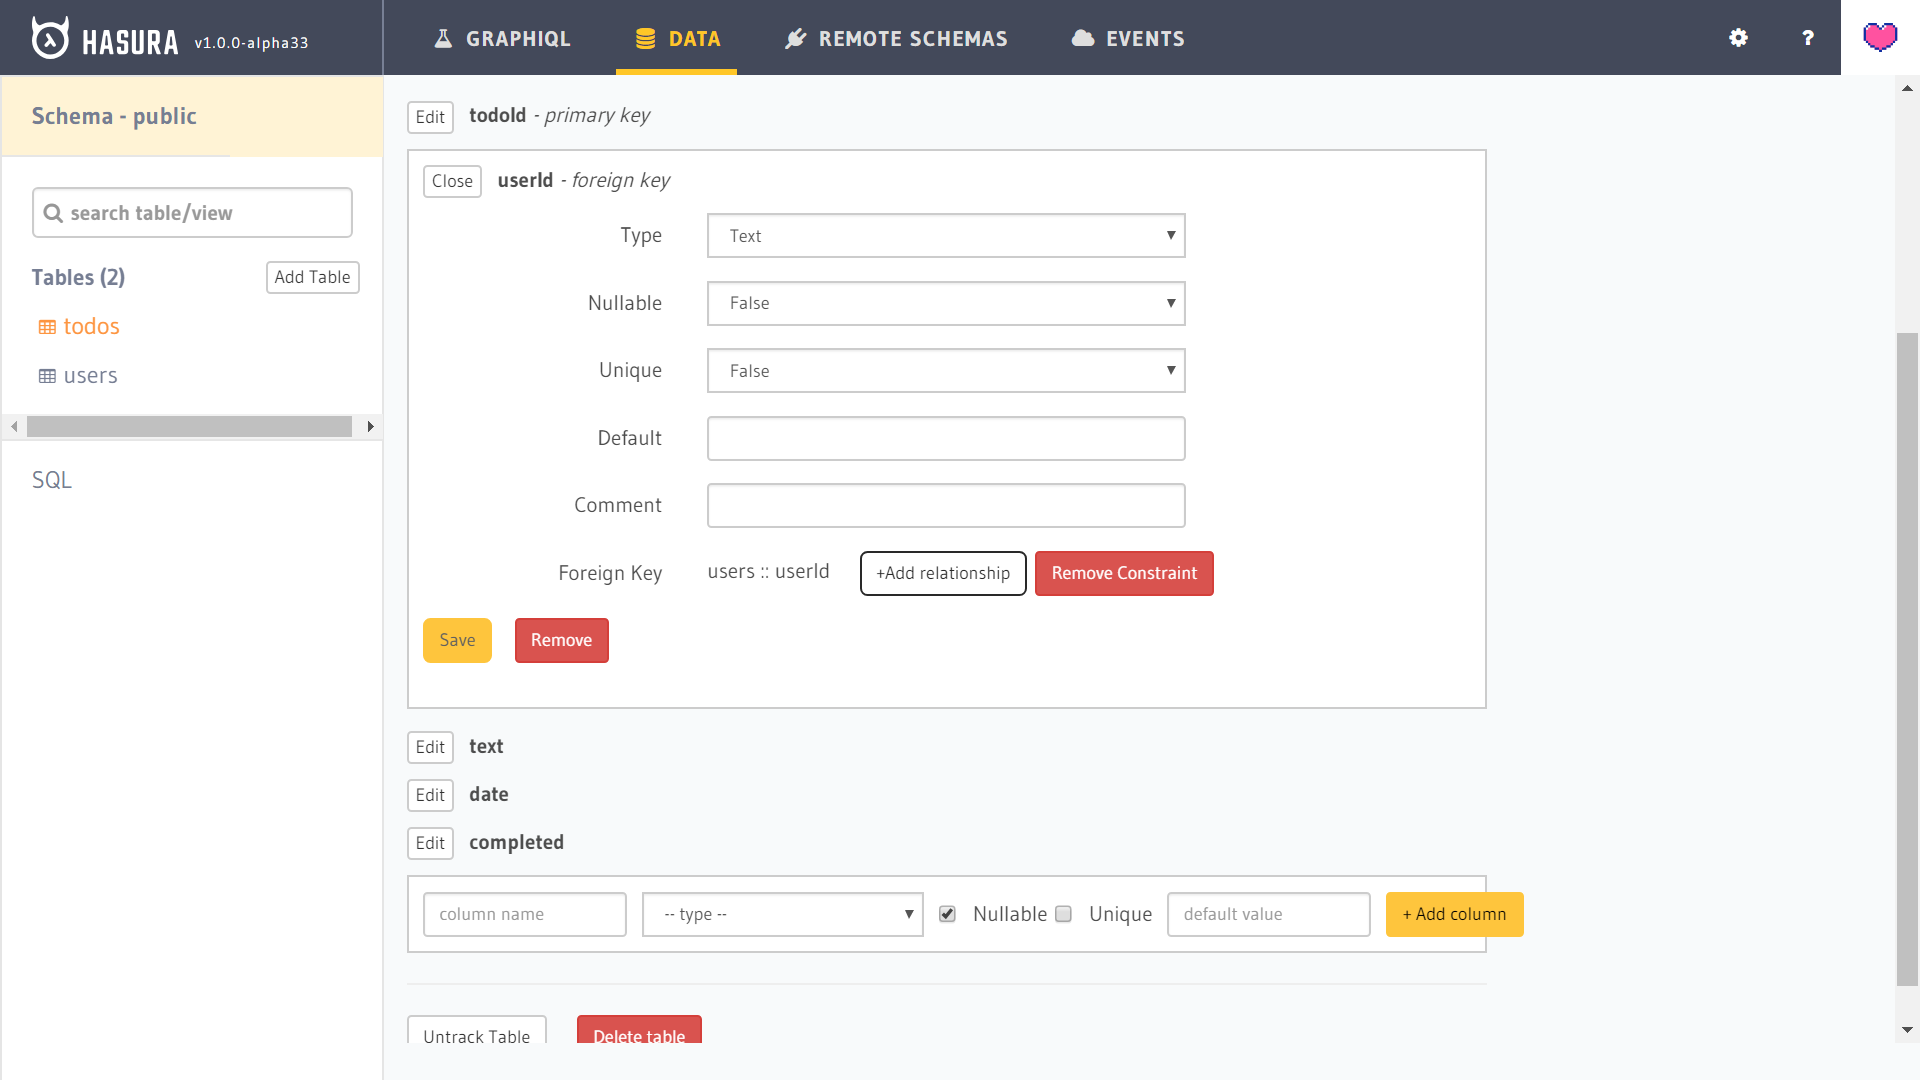
We’re all set on the schema side! Let’s check out our database using GraphQL queries.
Testing database as admin using GraphQL
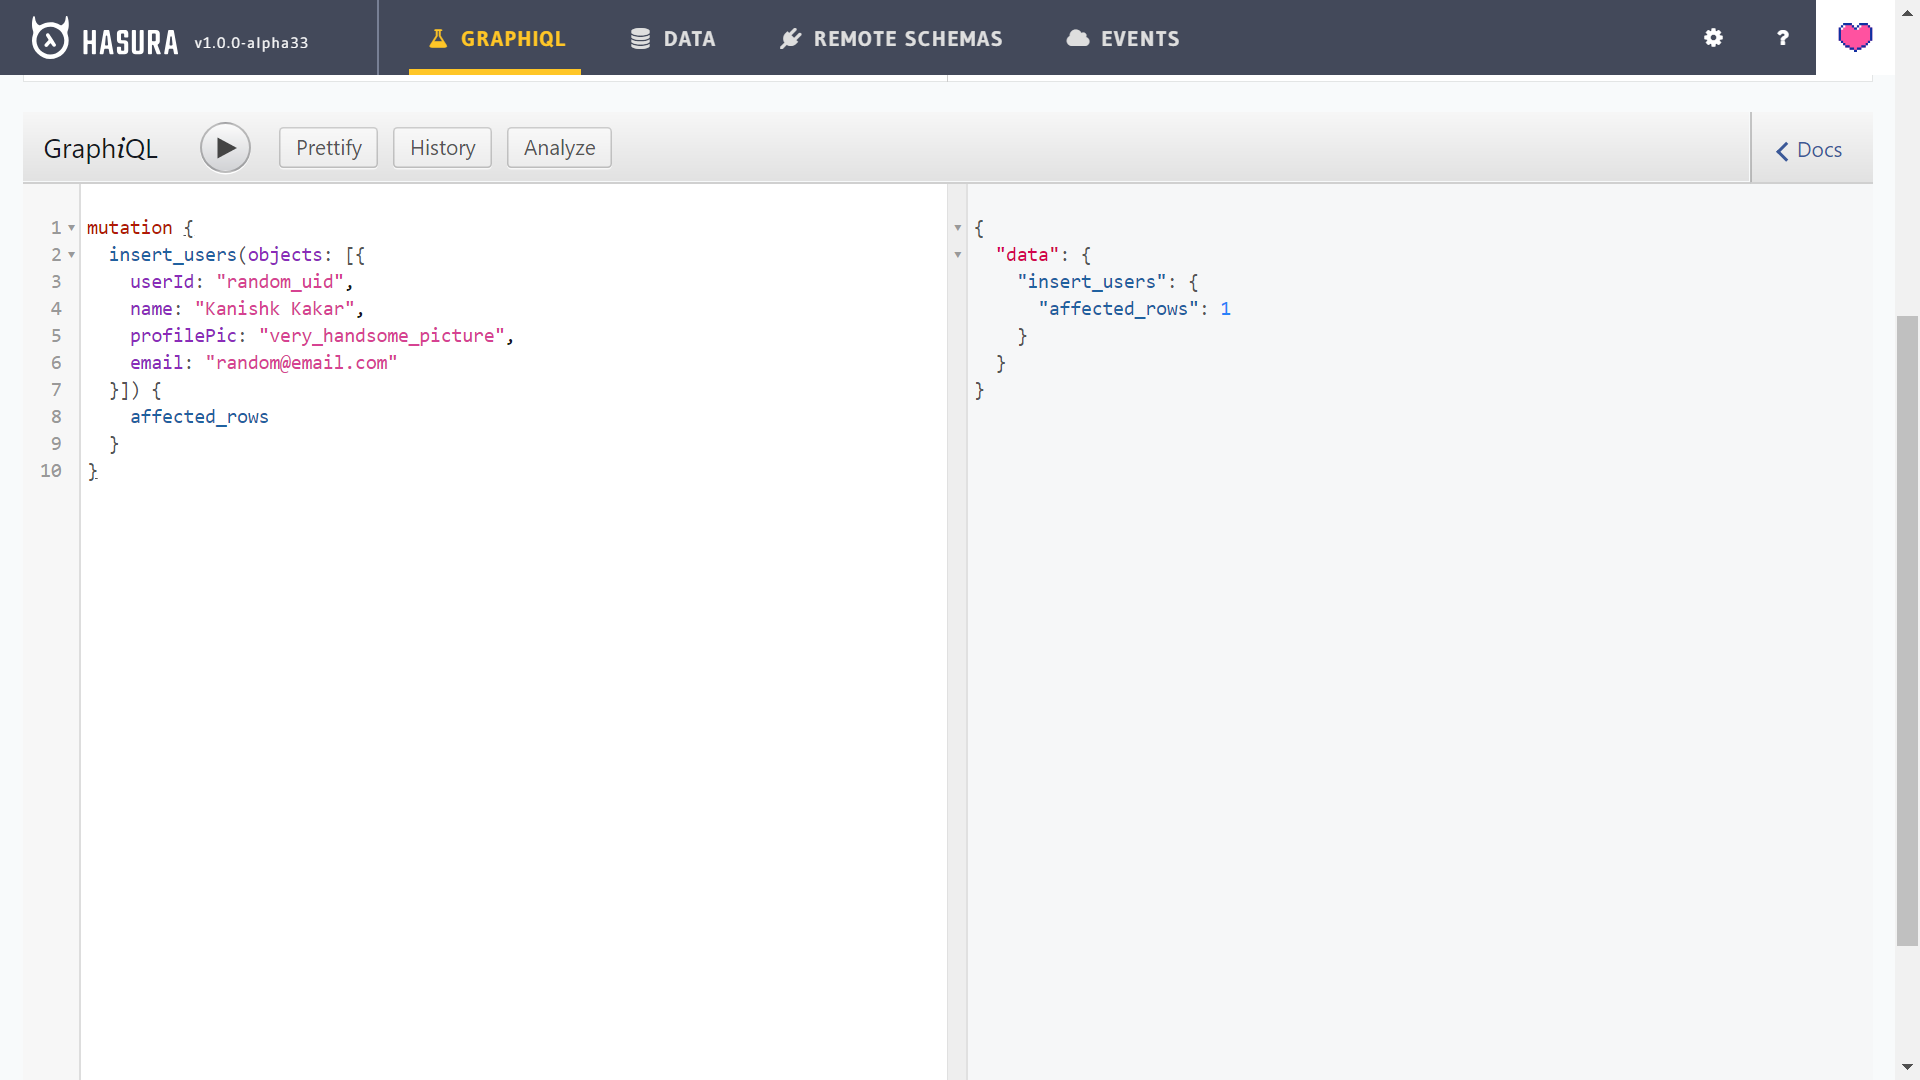
Navigate to the GraphiQL tab and write your first query. (actually, it’s a mutation, but let’s not be that pedantic).
This is what it looks like:
mutation {
  insert_users(objects: [{
    userId: "random_uid",
    name: "Kanishk Kakar",
    profilePic: "very_handsome_picture",
    email: "random@email.com"
  }]) {
    affected_rows
  }
}
On executing the above, you should see something like this:
Let’s test this using a query on the same relation:

As you can see, we (the front-end) define which user we want by means of the {where: { _eq: 'whatever' }} and then specify that we only want the user’s email, not his profile picture or name. That’s how GraphQL speeds up API development.
However, we’re executing these queries as the admin right now. We need to give certain privileges to the end users of our app as well.
Role-based permissions
Hasura’s engine makes IAM really easy for us. Under data, choose a table and then click on the Permissions tab. Enter a new role (I’ll just call mine user, and set permissions for different operations there).
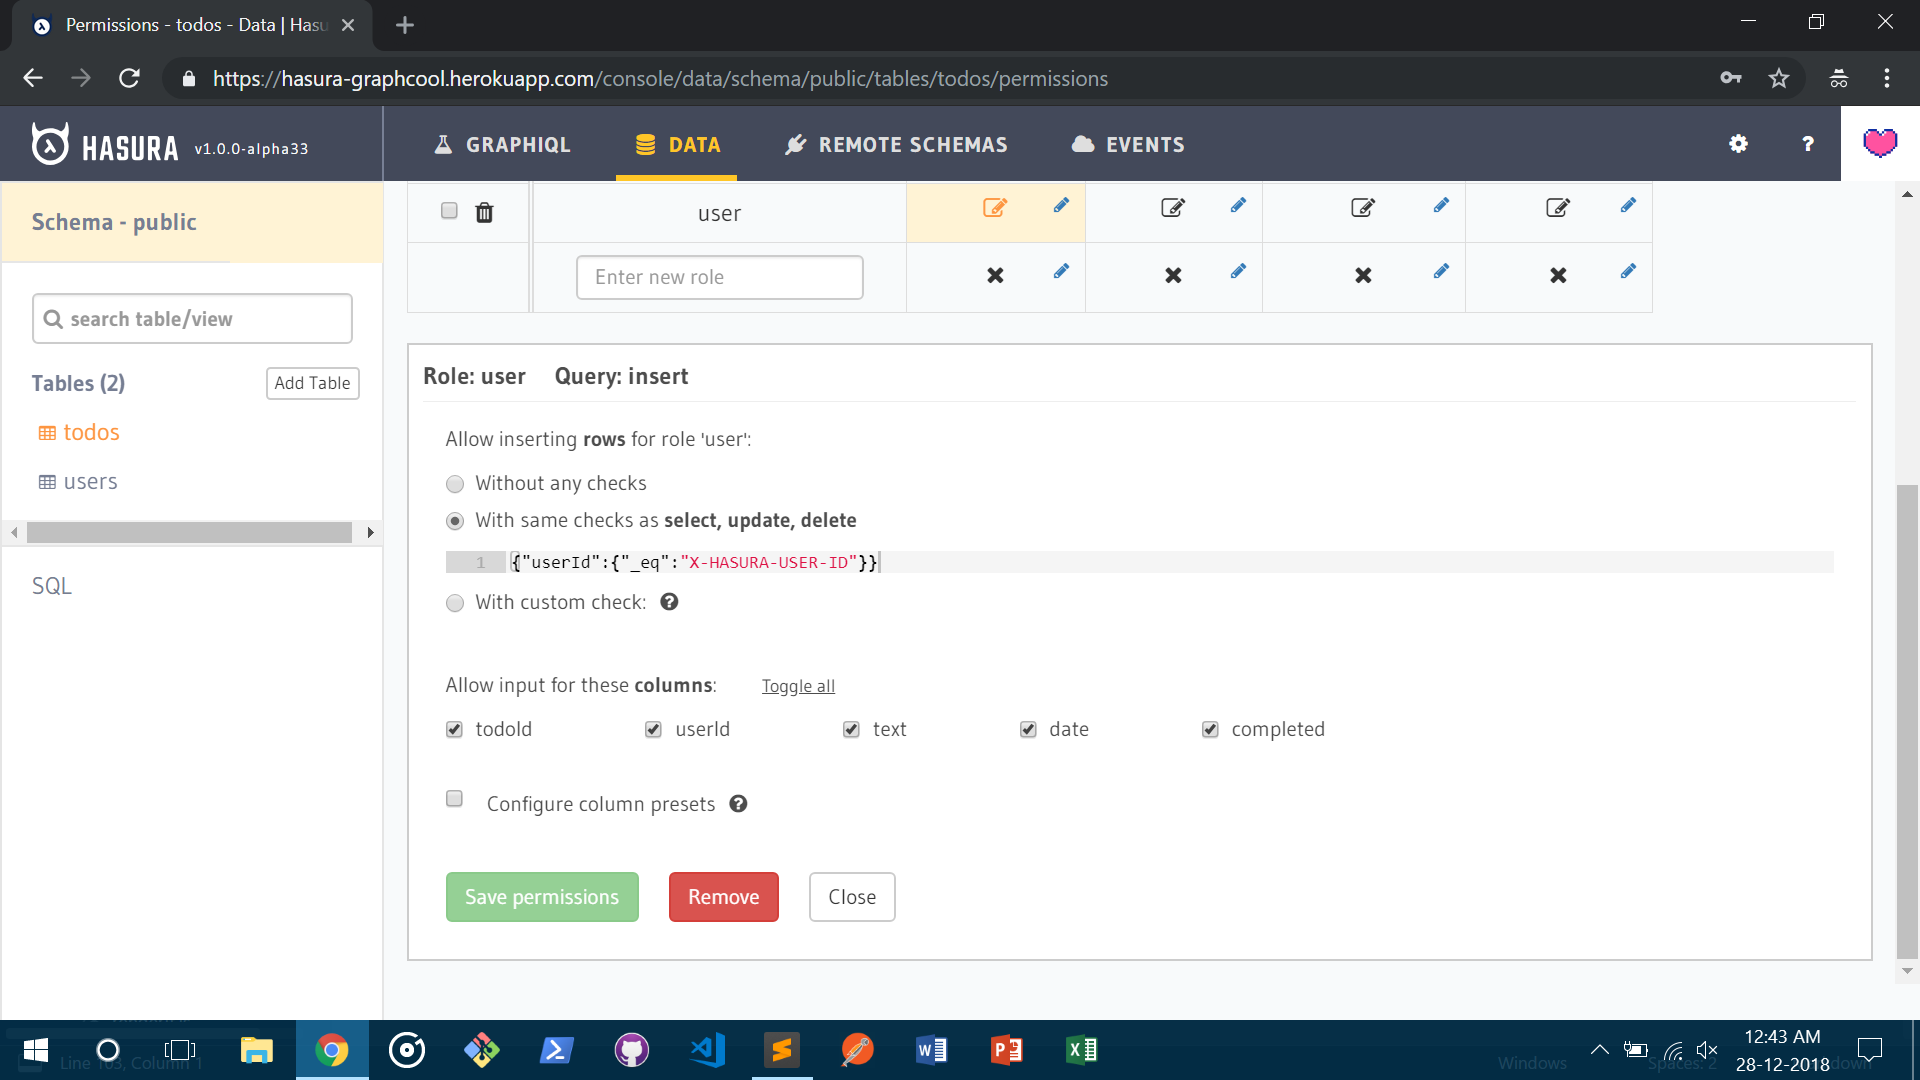
This helps you define different user roles quickly, and was a personal delight for me.
This may seem trivial right now, but is actually an important step to understanding Hasura’s engine: when we specify in the permissions policy that we require a condition (say, the equality condition on
userId, as in my case) to be true for a database operation to complete, then our GraphQL API expects theX-Hasura-User-Ideither as a header or as an object being returned from a webhook set up for authentication. I’ll cover this down below.
Auth
Front-end
To set up a login system, we’ll use Firebase. Now, building the front-end system for that is trivial - we need to log on to the Google Cloud Console, create a new project, and then make a new Firebase app on the Firebase console. Now we’ll run $ npm install --save firebase and follow the instructions for Node.js on this Google-provided tutorial. We should have a function that looks like this at the end:
_onClickLogin = async () => {
    firebase
      .auth()
      .signInWithPopup(googleProvider)
      .then(async res => {
        const token = res.credential.accessToken;
        const user = res.user;
        console.log(res);
        await window.localStorage.setItem(Constants.LOGGED_IN, 'yes');
        await window.localStorage.setItem(Constants.USER_OBJECT, JSON.stringify(user));
        await window.localStorage.setItem(Constants.USER_TOKEN, JSON.stringify(token));
        this.setState({ loggedIn: true });
      })
      .catch(err => {
        console.log(err);
      });
  };
Awesome. This handles auth for the front-end web app, but we also need to handle auth for our GraphQL API. Again, Hasura smoothens things out for us.
API
We’ll use Firebase Cloud Functions to authenticate requests made to our GraphQL API. Why? Because we’re already using Firebase, and I feel it’s best to stick to as few platforms as possible as long as functionality stays the same.
Hasura Auth basics explain the auth systems for the Engine very well, so I won’t do that, but we shouldn’t be sending key user information along with our API request headers. To handle that constraint, we’ll be using auth webhooks instead.
Before we do that, Hasura requires us to specify an access key on the API console. This is pretty easy. Head over to the API dashboard at Heroku’s Settings, and click on Reveal Config Vars, as shown below:
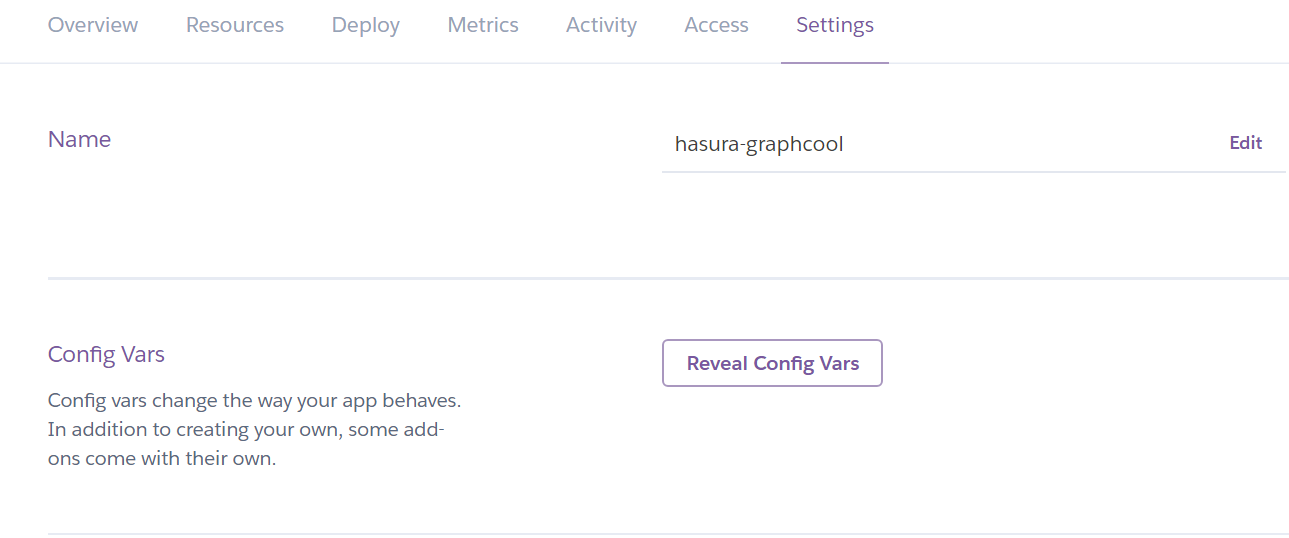
Add a config variable HASURA_GRAPHQL_ACCESS_KEY and set it to whatever value seems best. You’ll now also need this to log in to the API console.
Full disclosure: I properly understood how auth webhooks work only when I completed this app. Pretty cool stuff.
While Hasura’s sample on this topic is a great place to start, I think we can do a little bit better by skipping the need for a config.js file. Instead, as shown in the webhook handler I wrote here, we simply use the functions.config() method to initialise the app with our Firebase admin credentials. At this point, it’s probably a wise idea to make a separate webhook/ folder inside our main repository and continue working there.
To initialise the Firebase functions repository, we need to have the firebase CLI installed. Briefly, we need to do the following:
$ npm install -g firebase-tools
$ cd webhook
$ firebase init
Firebase will ask us a bunch of questions. Once that’s done, all we have to do is hit firebase deploy.
Once we do that, we’ll get a Firebase function URL in our terminal. Copy that, head over to the config variables section in our Heroku app dashboard, and add another config variable - HASURA_GRAPHQL_AUTH_HOOK. Set this to the URL of your Firebase function. (It should be something along the lines of https://us-central1-whatever-app.cloudfunctions.net/yourwebhook). This was required so that Hasura Engine where to request user information from when we make requests to it.
Front-end work
Alright, our API’s running well, our database is secure, and we know how to handle login. Let’s quickly go over how I built the front-end for this app.
Essentials
We’ve already got a basic front-end app running that accepts Google login information. We’ll now define another route (I’m using the react-router-dom package for this) and declare the real UI components of our app here. Following my code might help for this section.
I’ve used the reactstrap package for quickly designing common components like the input bar, list items, and relevant modals.
We’ll define the obvious onClick and onSubmit methods to get the text of our todo item in the state, but how do we communicate this data to our GraphQL API?
We’ll add a new file src/graphql.js. We’ll export constants that are wrapped in a backtick string, something like this:
export const update_todos = `
  mutation($todoId: String!) {
    update_todos(where: { todoId: { _eq: $todoId }}, _set: { completed: true }) {
      affected_rows
    }
  }
The above constant accepts the todoId as an argument. We just need to handle the actual sending of the request now.
There are two ways to do this:
- Using a GraphQL client library like Apollo (recommended for larger projects)
- Writing a simple utility
.jsfile to handle requests (recommended for learning more about the architecture behind-the-scenes).
As you may have guessed, I went with 2. And it turns out that Hasura helps us with that too - the same page which we used while setting up our auth webhook details how to write such a file. So without adding any unnecessarily heavy dependencies to our project, we can just use this system.
I modified the file as AxiosUtility.js in my repository, changing the main API code to the following:
export const postAxios = async (queryString, variables) => {
  const idToken = await getIdToken();

  const axios = axiosBase.create({
    baseURL: Constants.hasuraUrl,
    headers: {
      'Content-Type': 'application/json',
      Authorization: 'Bearer ' + idToken
    },
    responseType: 'json',
    method: 'post'
  });
  console.log(variables);
  return await axios({
    data: {
      query: queryString,
      variables: variables
    }
  }).catch(({ response: r }) => console.log(r));
};
As you can see, it accepts query variables also.
Having written mutation and query operations, we can quickly implement adding users, adding todos, and retrieving todos for a given user by calling the postAxios() method above.
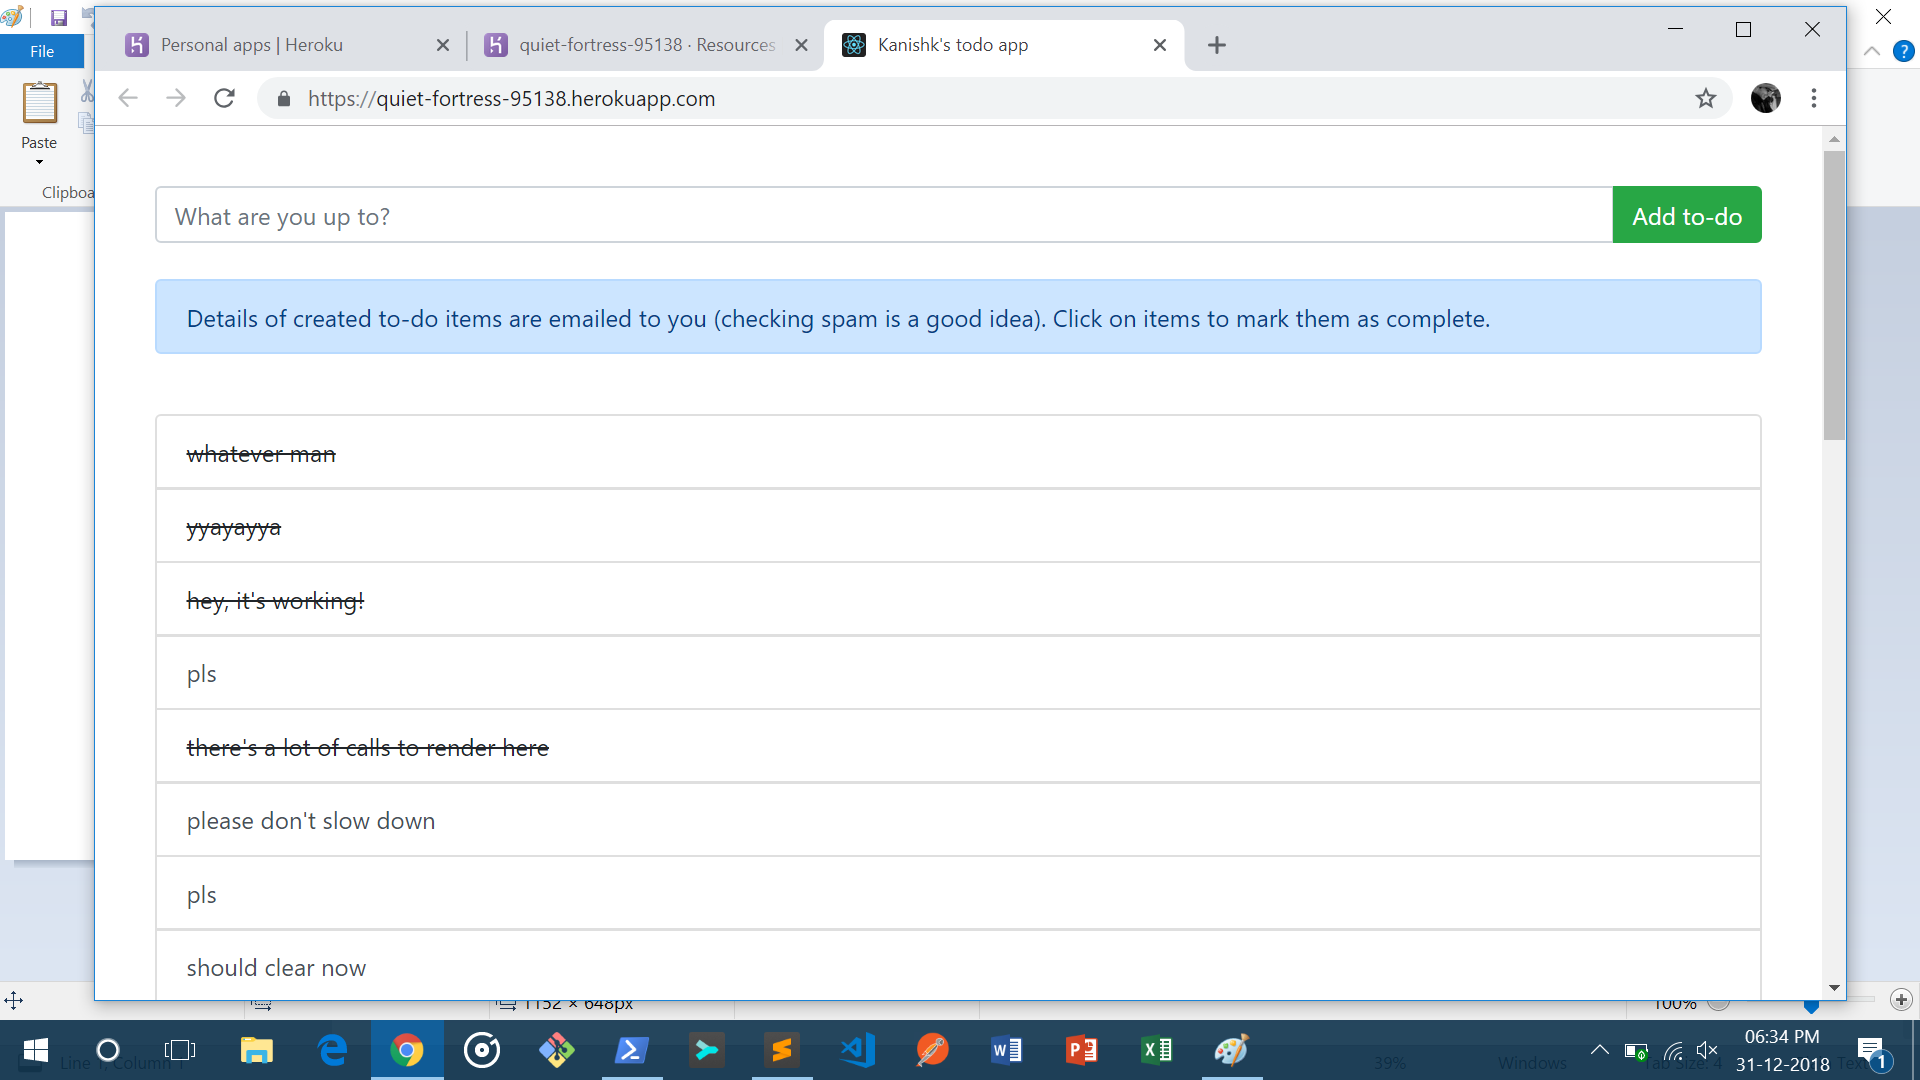
Once we’re done with that, we’ll have to test our app. Navigate to the root directory of the React project and run $ npm start (or $ yarn run, whichever you prefer).
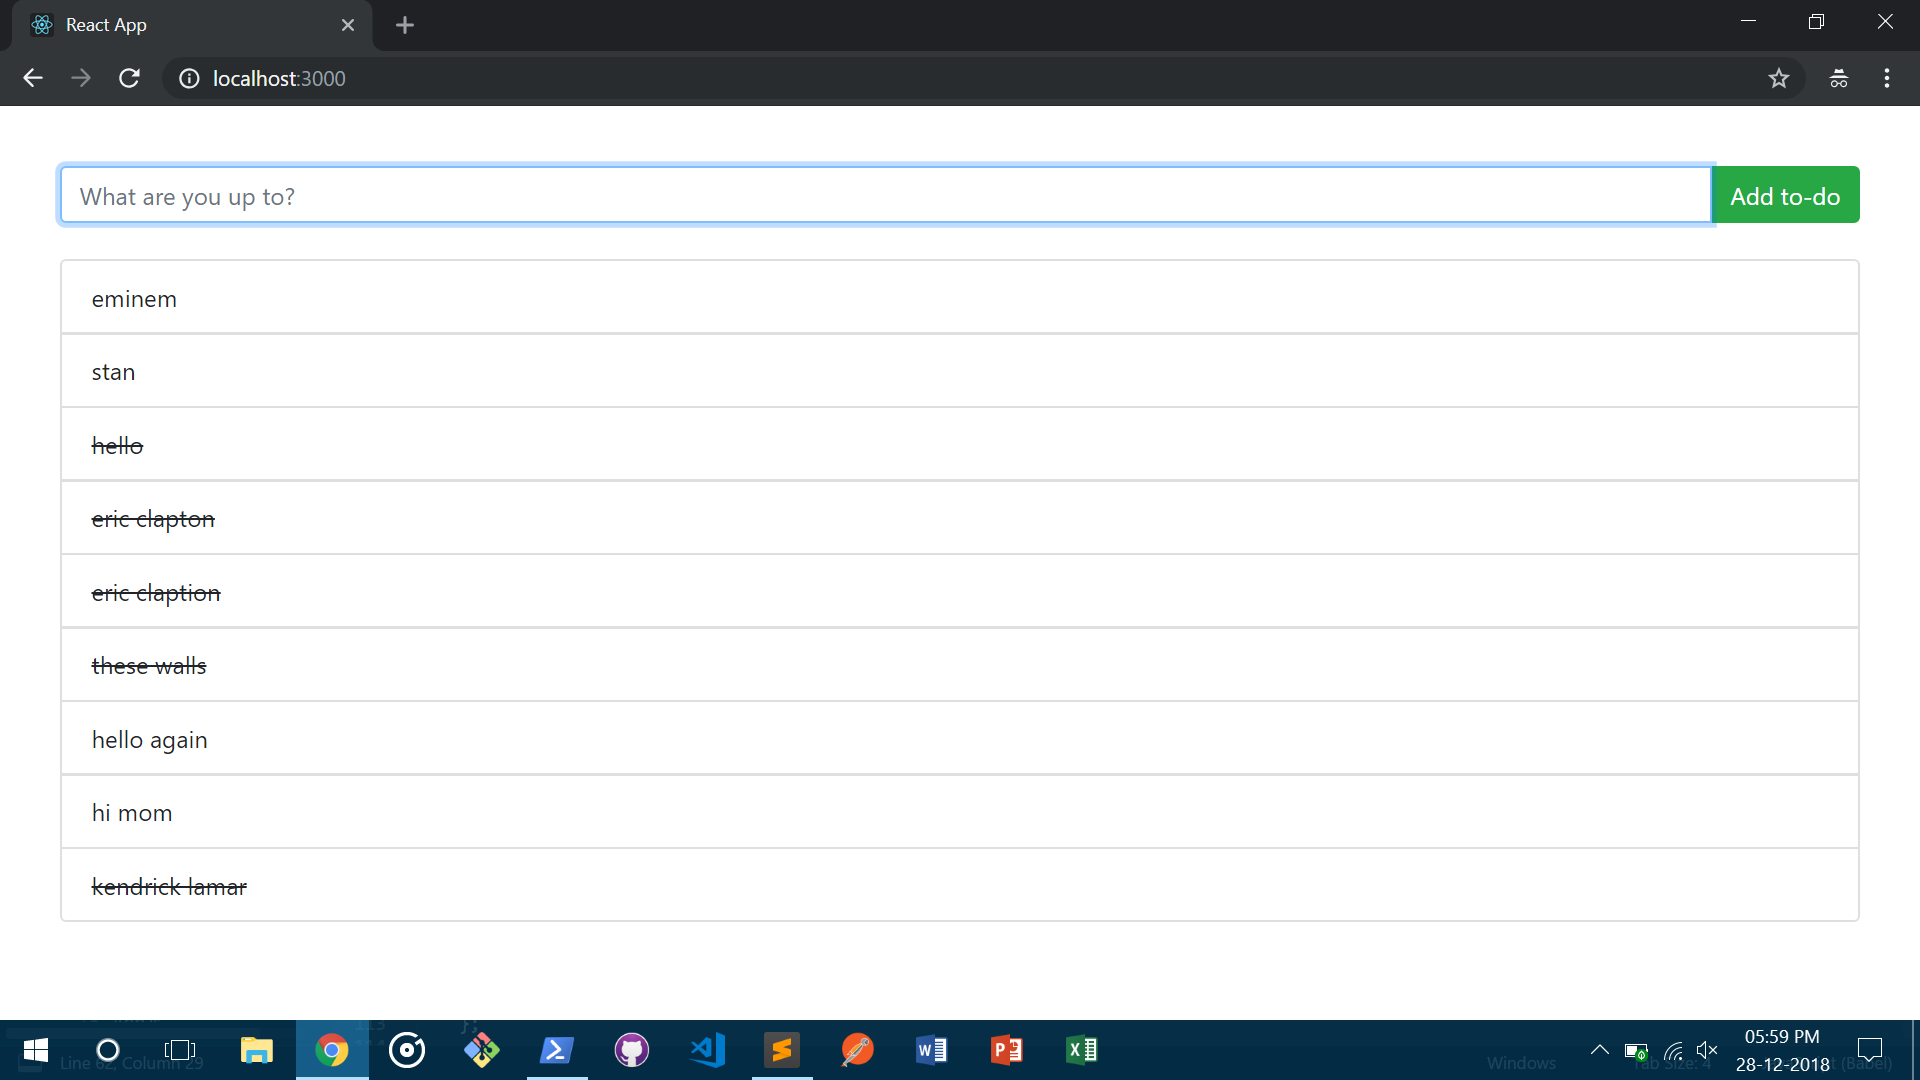
As you may see in the above picture, some of the todo items have been struck out. That’s what I’ll come to next.
Complete/incomplete tasks
We should probably allow users to mark a task as completed. I did this by rendering a simple modal every time someone clicks on a todo item, like this:
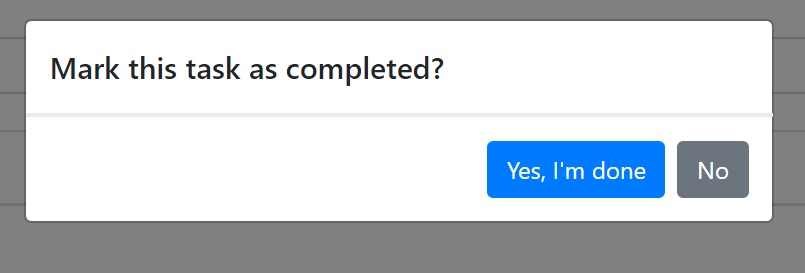
Clicking yes invokes the update operation I wrote above, and updates the task as completed. Completed tasks are struck off and moved to the bottom by a simple this.setState() method call.
Event triggers
Let’s take full advantage of the features Hasura gives us for our app here. We’ll email the user every time they register a todo. How does this help? Well, there’s always the case of an account getting compromised, but in a to-do app, this is mostly for the purpose of a demo of what the engine can do.
Since Firebase Cloud Functions does not send requests to external APIs until we configure a billing account, we’ll skip that for now and write our own Express web server using Node.js. We’ll deploy this on an AWS EC2 instance, and use SendGrid to send emails to the user concerned.
So how do we handle this? Remember how we stored each Firebase UID along with the corresponding todo? The firebase-admin package allows us to use that to get the email of the user. So our Express POST endpoint looks something like this:
app.post('/', (req, res) => {
  // obtain data inserted
  const insertedTodo = req.body.event.data.new;
  const sgMail = require('@sendgrid/mail');
  sgMail.setApiKey(process.env.SENDGRID_API_KEY);

  // emails.from is the email ID configured for use with SendGrid

  admin
    .auth()
    .getUser(insertedTodo.userId)
    .then(userRecord => {
      const userEmail = userRecord.toJSON().email;
      const msg = {
        to: userEmail,
        from: emails.from,
        subject: "Kanishk's GraphQL To-Do app",
        text:
          'You added a todo that says ' +
          insertedTodo.text +
          ' with an ID = ' +
          insertedTodo.todoId
      };
      sgMail
        .send(msg)
        .then(resolve => {
          res.sendStatus(200);
        })
        .catch(error => {
          console.log(error);
          res.sendStatus(500);
        });
    })
    .catch(error => console.log(error));
});
The req.body.event.data.new is sent to us by the Hasura GraphQL Engine, and contains the data in the newly inserted todo item.
We shouldn’t be exposing our SendGrid API key, so we should run the following commands in our terminal:
echo "export SENDGRID_API_KEY='YOUR_API_KEY'" > sendgrid.env
echo "sendgrid.env" >> .gitignore
source ./sendgrid.env
The SendGrid guide has excellent documentation on how to set up a mailing system with Node.js.
Now comes the final and most important part: setting up event triggers for this webhook.
Before we do that, however, we need to deploy this server somewhere. I chose to use a standard EC2 instance running Ubuntu for this.
Deploying is relatively easy with nginx reverse proxy and pm2 process manager, and this DigitalOcean tutorial helps a lot with learning more about this.
At the end of setting up this deployment, we should have a site config file that looks like this in the /etc/nginx/sites-available/ directory:
server {
  listen 80 default_server;
  listen [::]:80 default_server;

  server_name <YOUR_SERVER_IP_ADDRESS>;

  location / {
        proxy_set_header X-Real-IP $remote_addr;
        proxy_set_header X-Forwarded-For $proxy_add_x_forwarded_for;
        proxy_set_header Host $http_host;
        proxy_set_header X-NginX-Proxy true;
        proxy_pass http://127.0.0.1:3000/;
        proxy_redirect off;
        proxy_http_version 1.1;
        proxy_set_header Upgrade $http_upgrade;
        proxy_set_header Connection "upgrade";

        proxy_redirect off;
        proxy_set_header   X-Forwarded-Proto $scheme;
    }
}
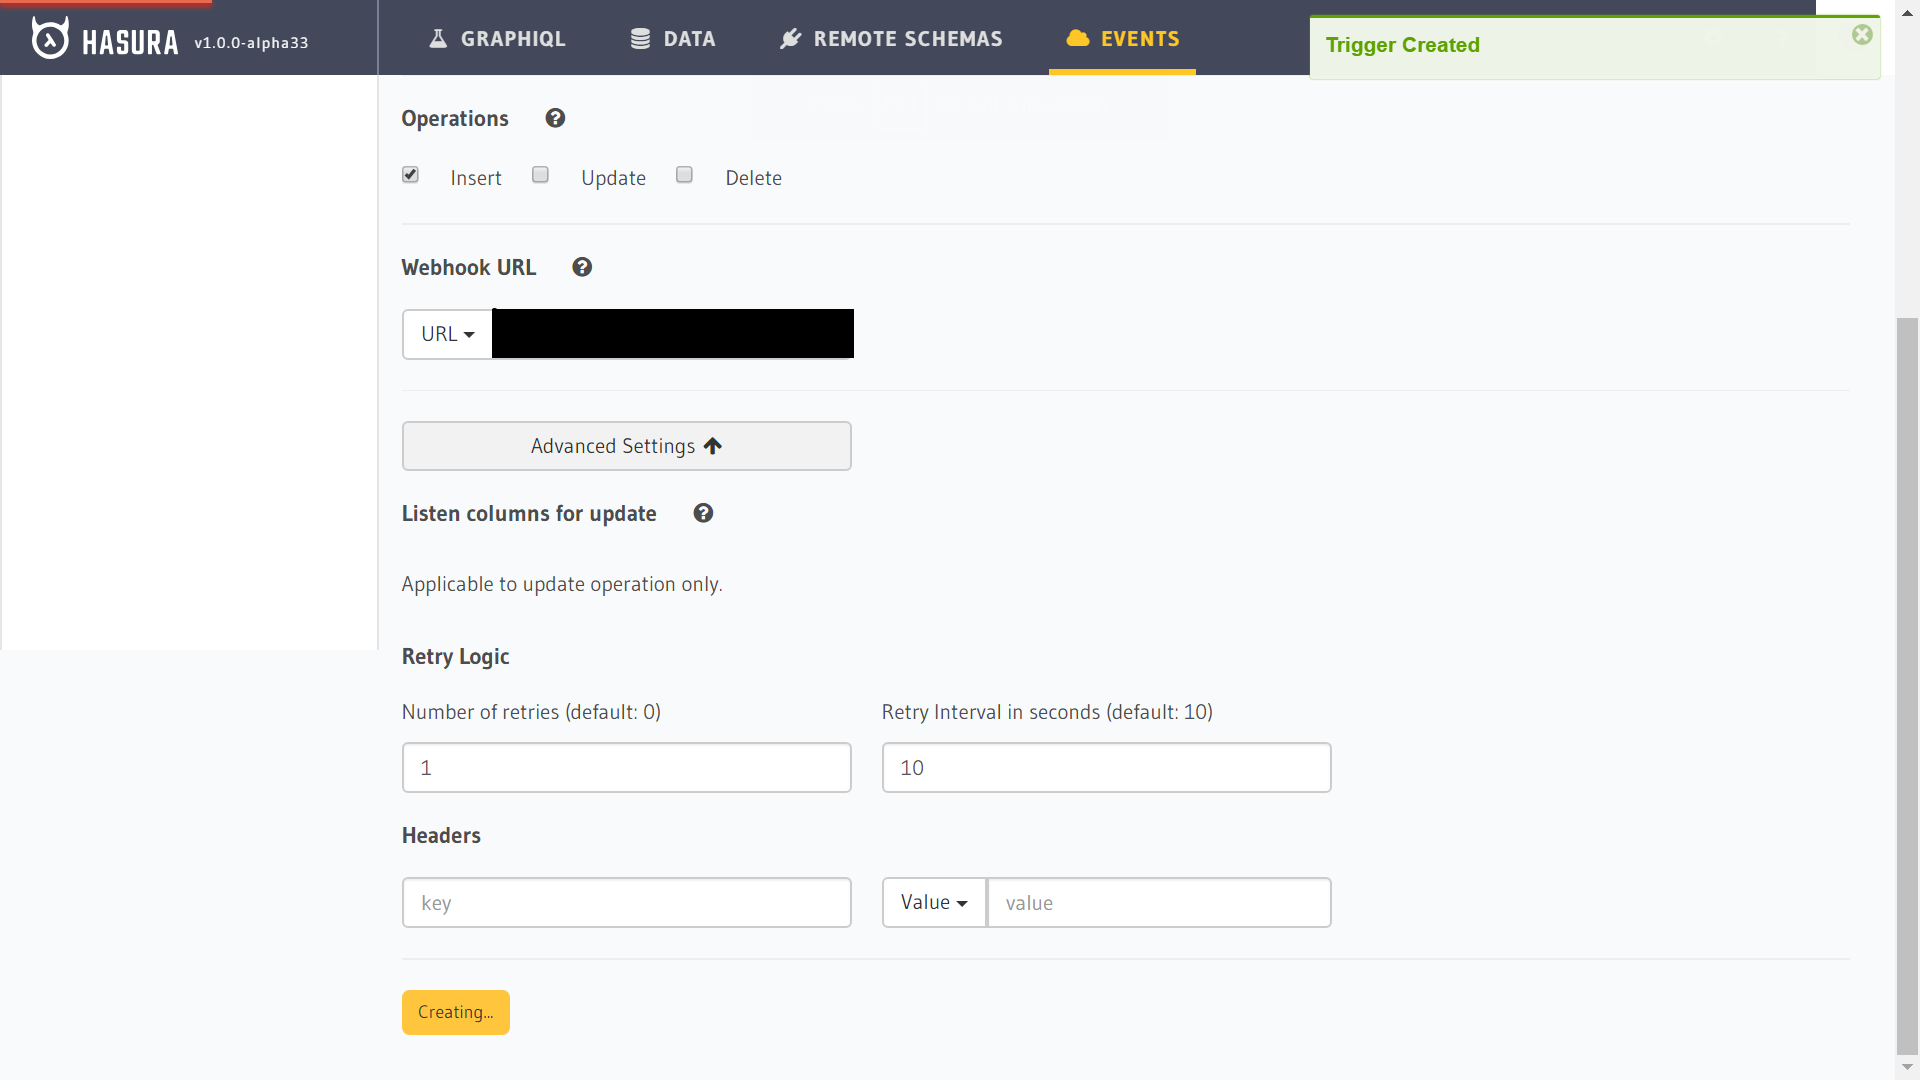
We’ll now head over to the Event Trigger section in our Hasura API Explorer and set up this webhook for insertions there. The UI is pretty self-explanatory, so I’m just gonna attach a screenshot to explain what you should be doing.
And we’re all set! Try inserting an item, and it should show up in your email (probably inside Spam, but that works for proof-of-concept).
Deployment
We might have a working repository on our local machine, but that’s of no use if we can’t hand it out to other people for feedback. Painless deployment of React.js apps is made easy with Heroku’s buildpacks.
TL;DR fire up a terminal and enter the following commands:
cd todoapp/
heroku create -b https://github.com/mars/create-react-app-buildpack.git
git add .
git commit -m "react-create-app on Heroku"
git push heroku master
heroku open
This should open up your React.js app on a free dyno on Heroku.
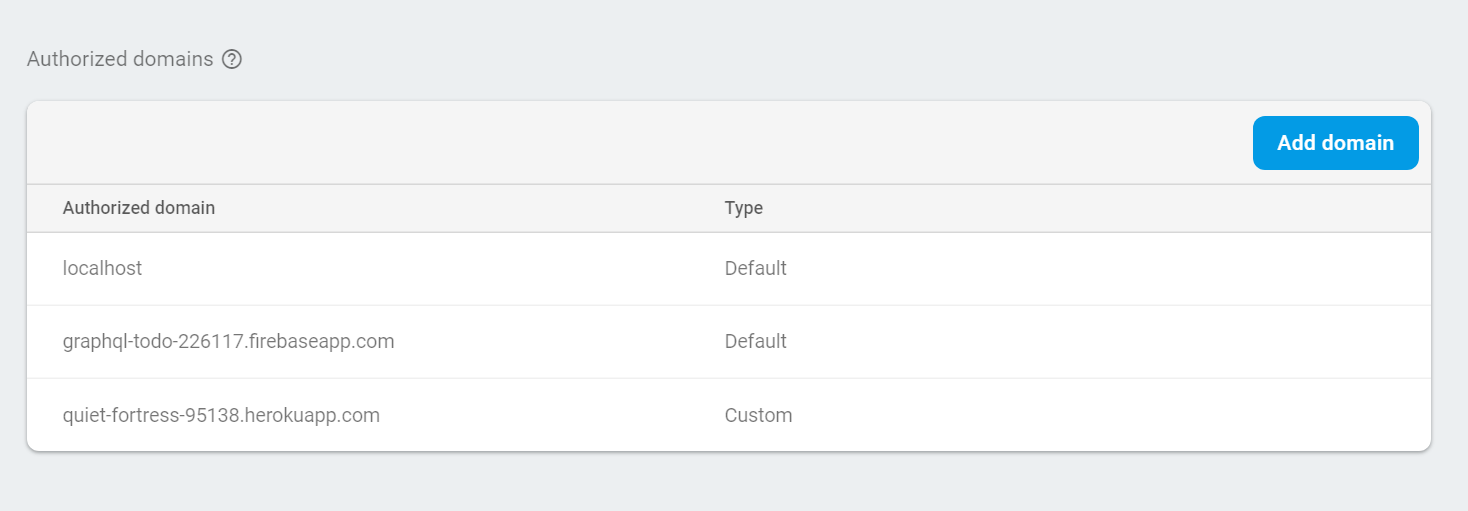
Try logging in. You’ll notice that the Google login window opens and then closes automatically. That’s because Firebase doesn’t recognise the domain of our app yet. Easily fixed - log on to the Firebase console, click on Authentication, and then add the app’s domain as an authorized domain. This is what this should like:
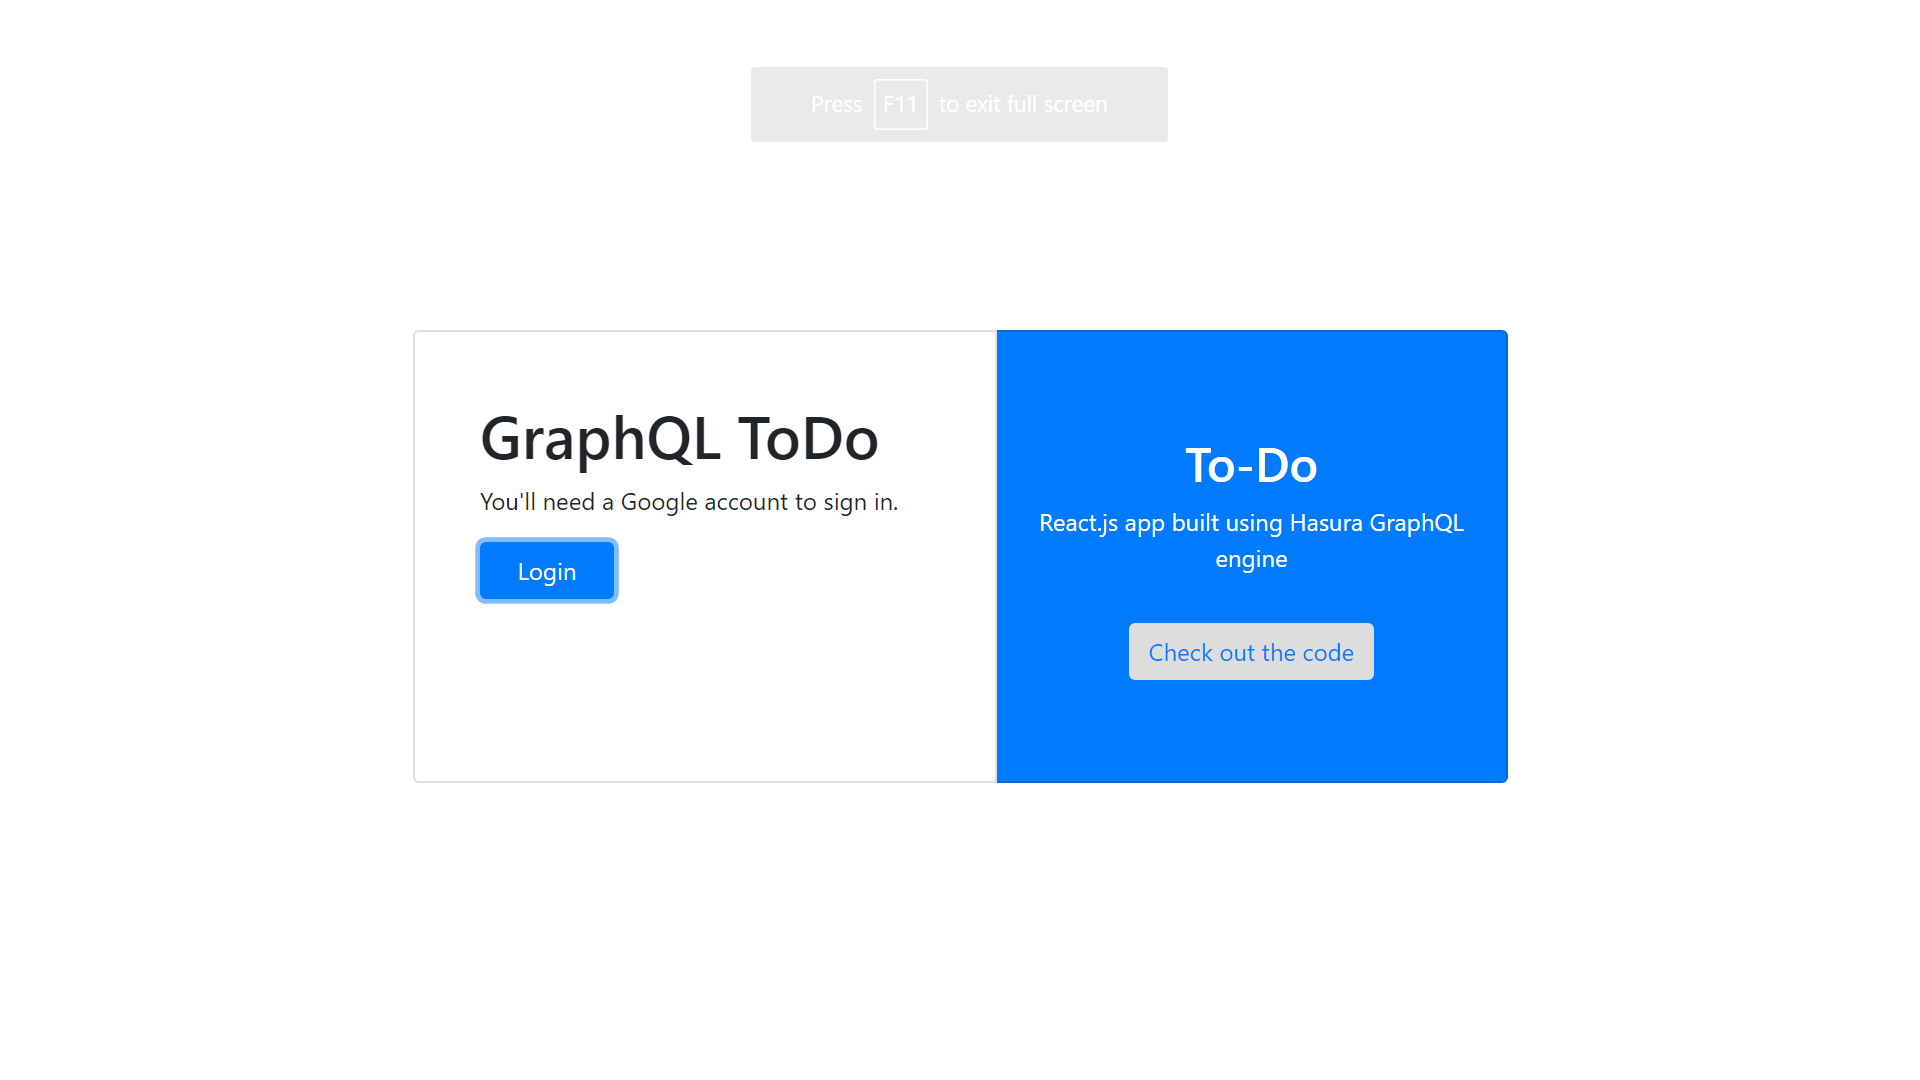
That should be enough to deploy the app. I’ve attached a screenshot of my final deployed app:
Possible improvements
A professional todo app should also allow users to set deadlines for their tasks and allow sorting of todo items as well. Check out SortableJS if you’d like to reorder todo items on drag. I haven’t covered such improvements for now because that doesn’t really cover any new ground as far as Hasura’s engine is concerned - it’s mostly front-end work. Submit a PR if you’d like to implement the same.
That marks the end of this tutorial. If you just want to try what I’ve built before getting your hands dirty, feel free to clone this project and run an $ npm install && npm start to play around. (You’ll have to deal with access keys, of course).
Personally, I learnt quite a few things while working on this app. Some of them are:
- The internals of the Hasura GraphQL Engine and how it connects to Heroku
- Using SendGrid for emails (gonna send tons of spam now)
- Writing auth webhooks
- Writing a properly documented tutorial with relevant links